Working with docker metaframes
Now that you know how to create simple metapages, we will learn how to use one of the most powerful tools in metapages, the Docker or container metaframe. In basic terms, Docker is a technology that allows you to create and run virtual computer systems within any other system. This is powerful because in this system, called a container, you can install exactly the software needed to run code, and the same docker container is identical no matter what system it is run on, so your code will always work, no matter where or when you run it. This powerful technology can be leveraged in metaframes with custom docker containers or configurations, allowing you to run virtually any code you can imagine enabling endless applications! To get you started with Docker in metaframes, let’s go through a simple example of creating a word cloud with python.
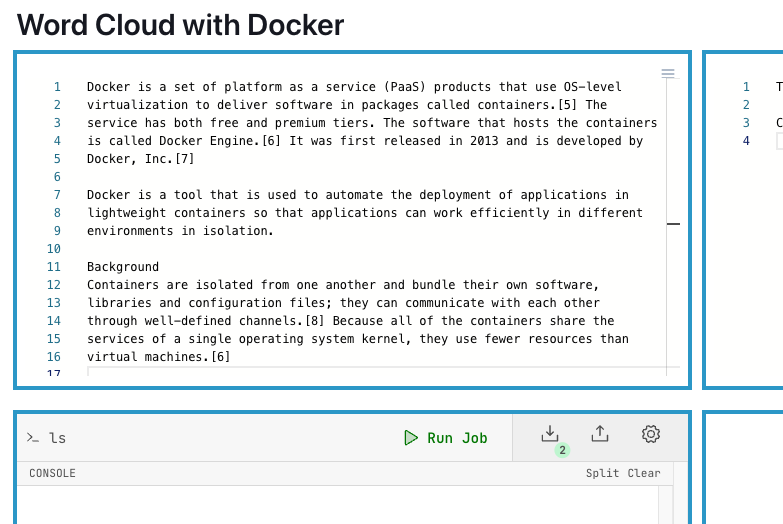
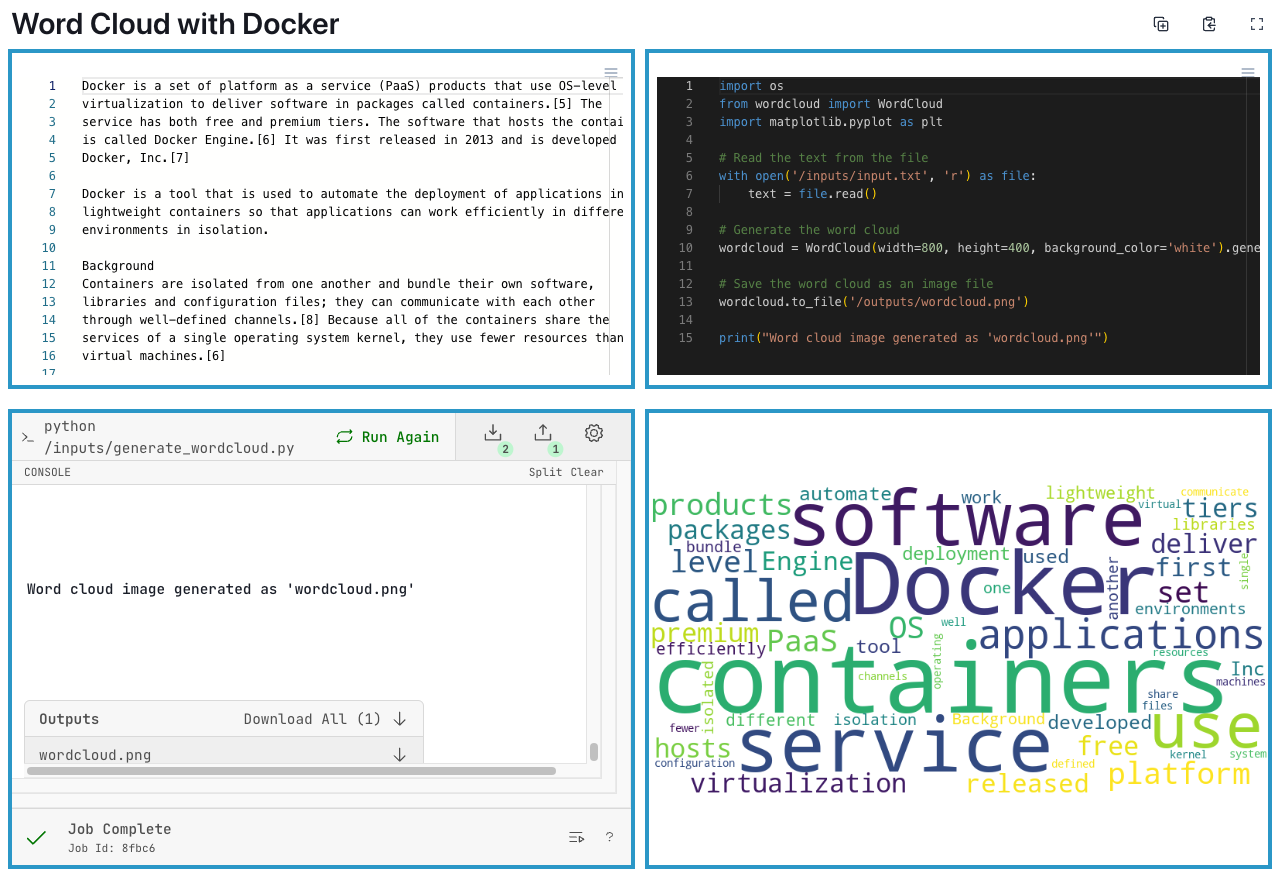
- Step 1: As done in the previous tutorials, create a new metapage. We will call ours “Word Cloud with Docker”

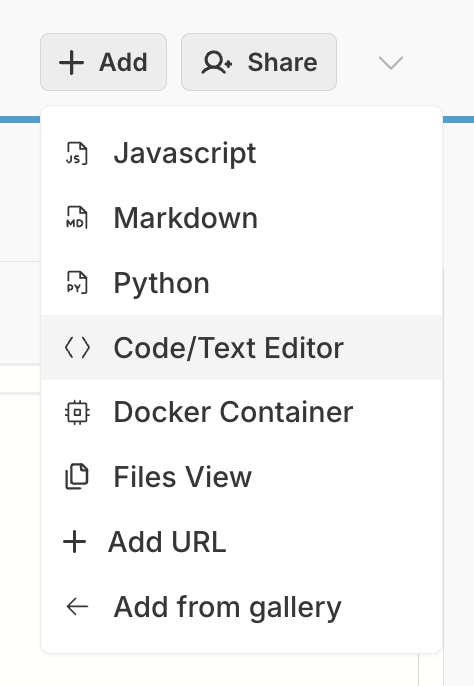
- Step 2: We will use four metaframes to construct this metapage. Two “Code/Text Editor” metaframes, one “Show Image”, and one “Docker Container” metaframe. Let’s add these now.
- Add Code/Text Editors: To add the two “Code/Text Editor” metaframes, click the “+ Add Button” at the top right and then select “Code/Text Editor”. Repeat this action to add a second editor metaframe.
- Rename editor metaframes: To keep track of what these will be used for, let’s rename these editor metaframes. Do this by using the metaframe’s drag button menu and selecting “Rename”. Rename one of the editors to “Word Cloud Text” and the other one to “Python Code”

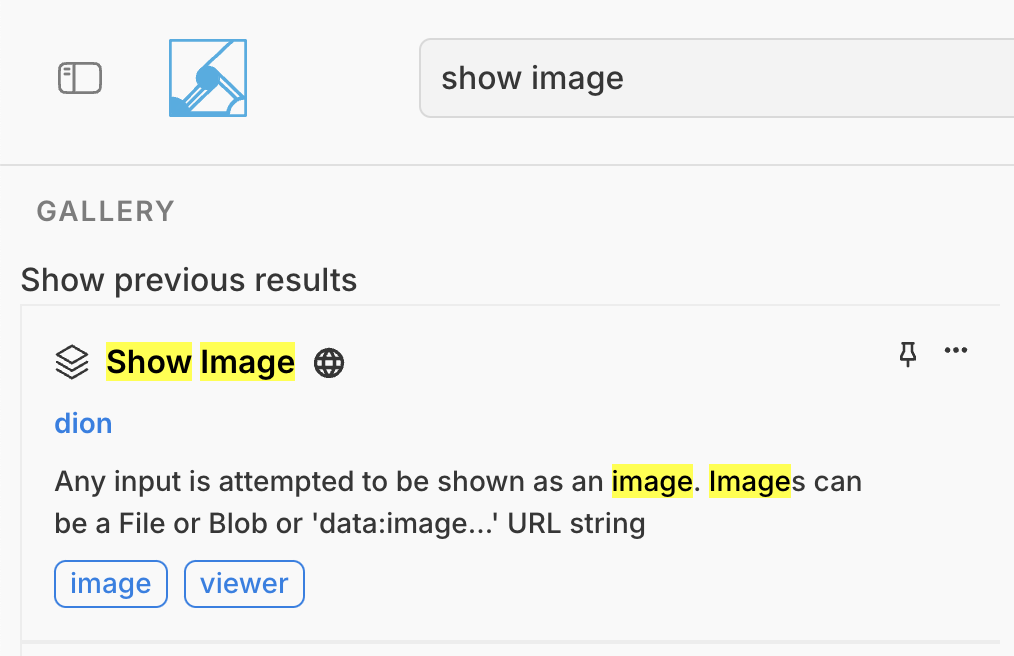
- Add Show Image metaframe: To add the “Show Image” metaframe type “Show Image” into the metaframe search bar and click the “+ Add” button next to the top result.
- Add Docker Container metaframe: Add the Docker Container metaframe by clicking on the “+ Add” button on the top right then selecting “Docker Container” from the options.
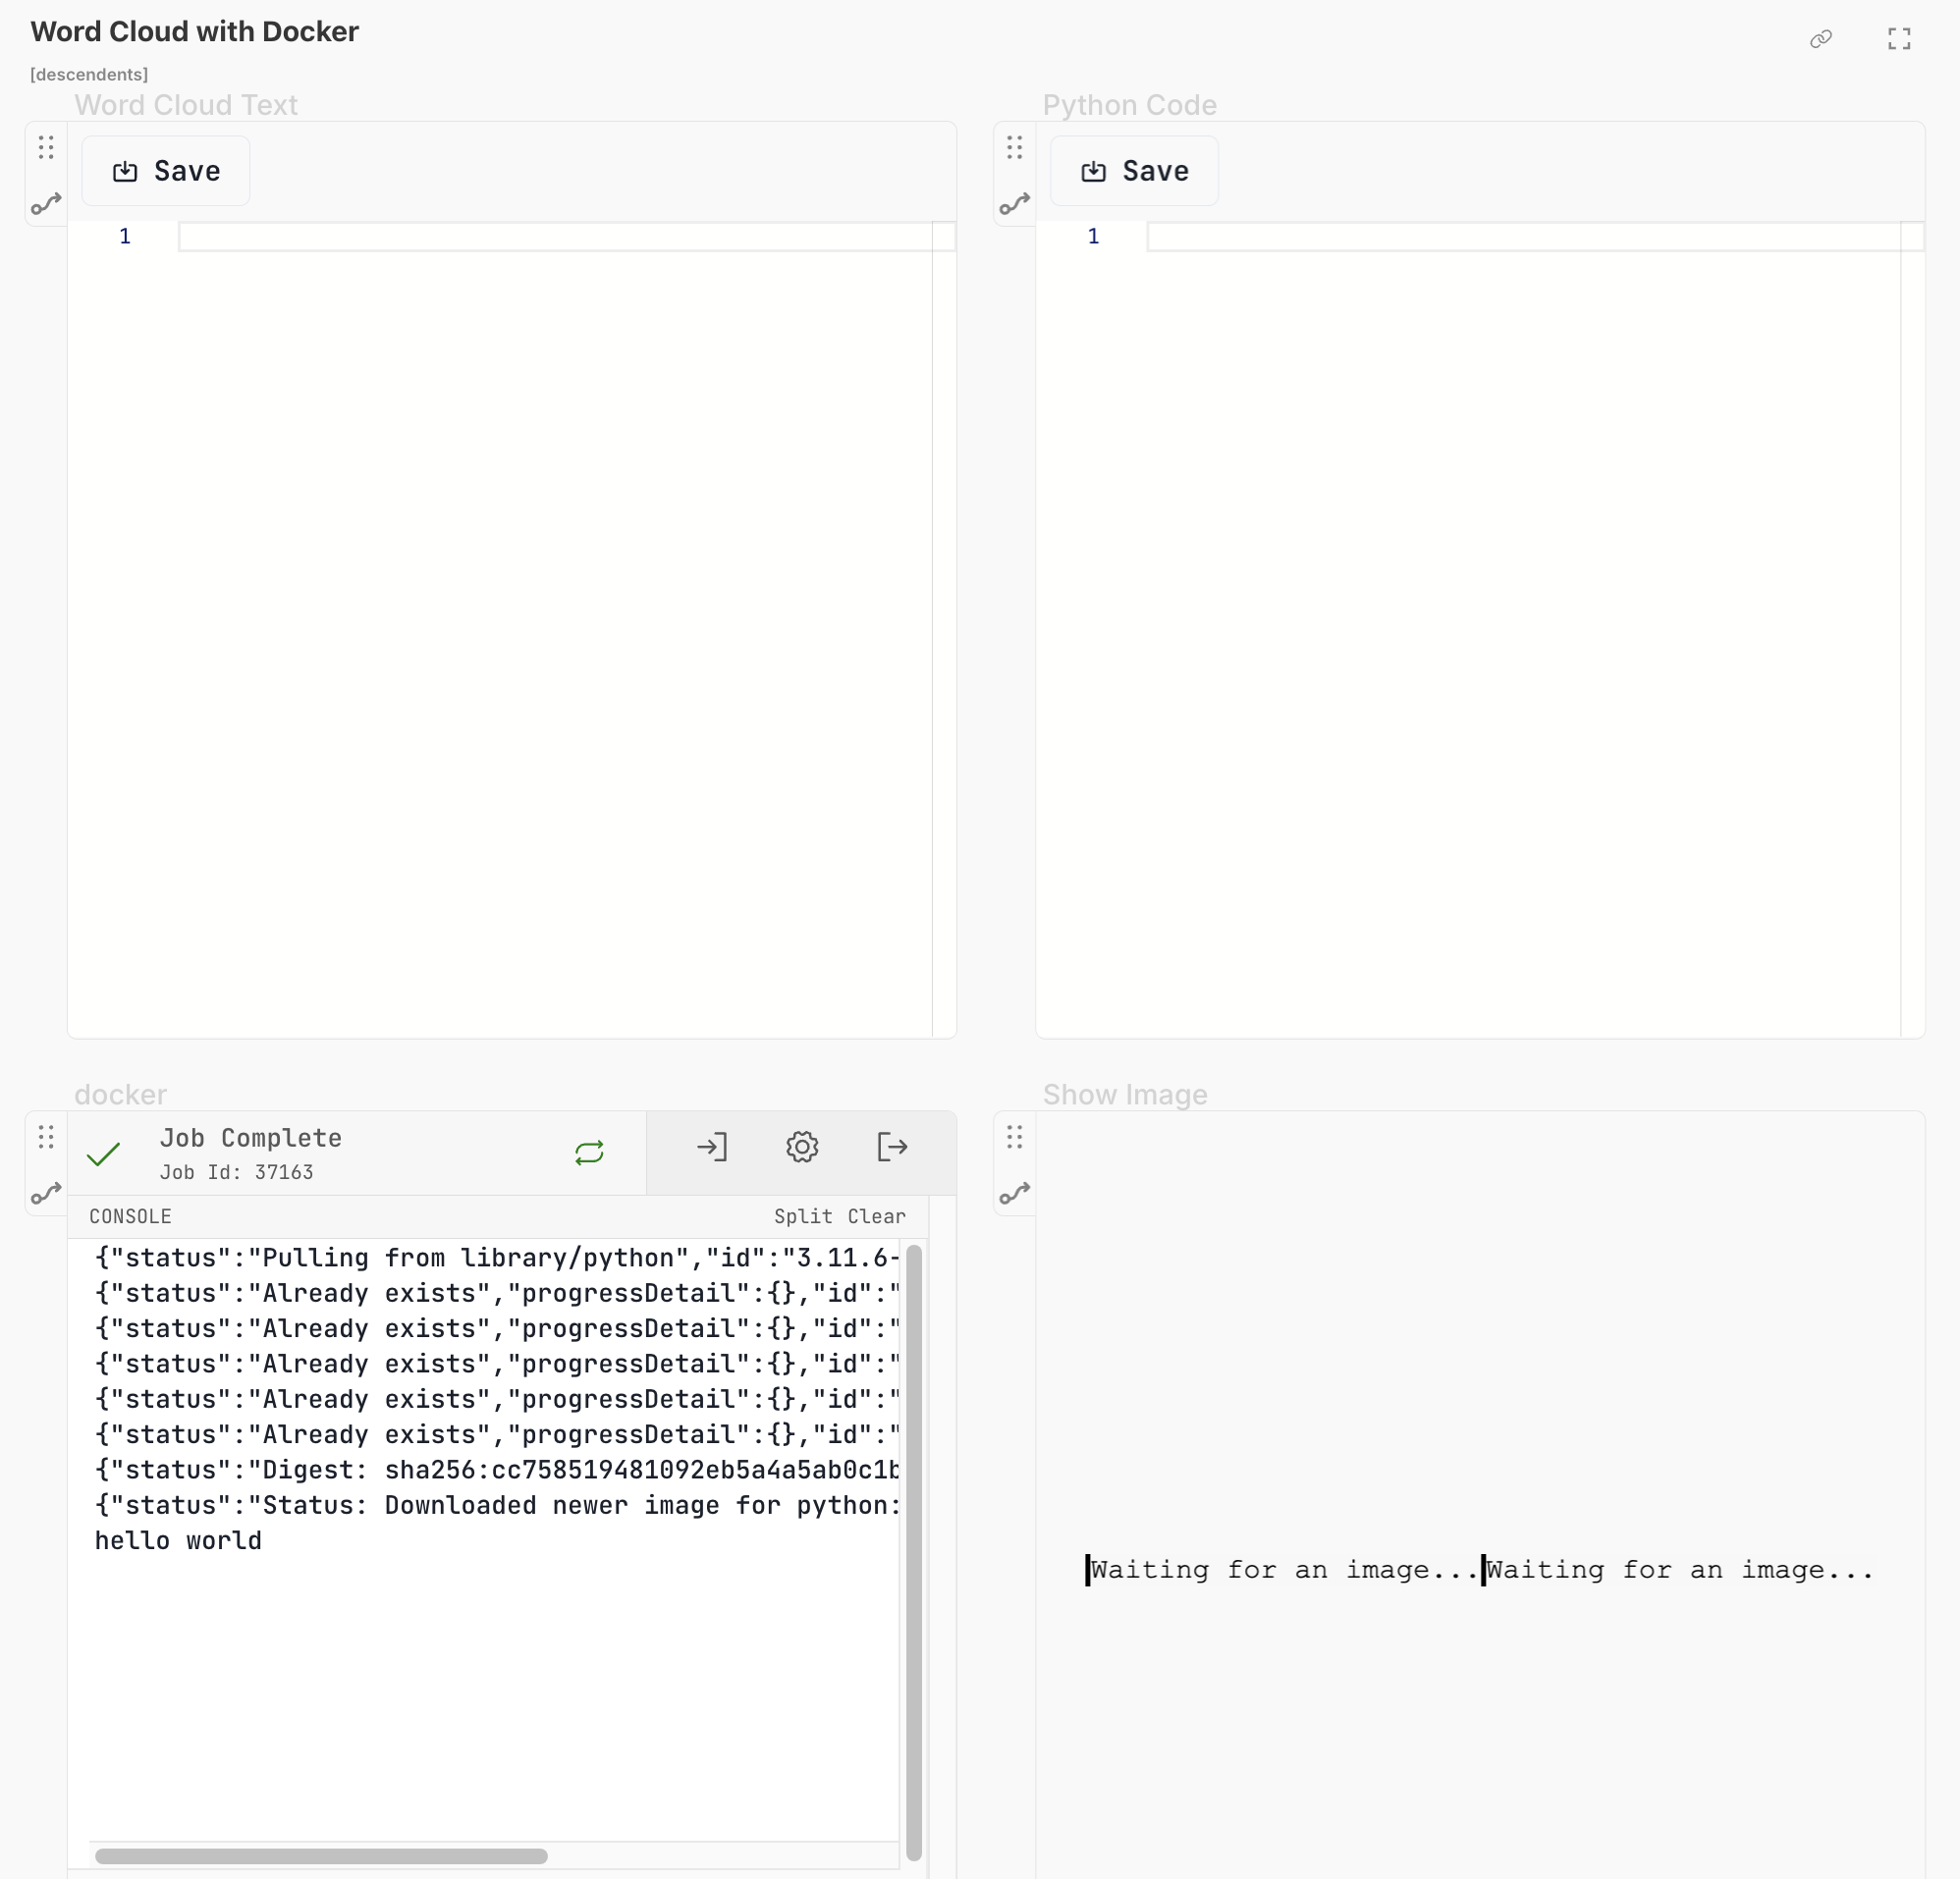
- Rearrange metaframes (optional): Using drag buttons near the top left corner of the metaframes and resize handles on the bottom right corners, resize and rearrange the metaframes you’ve added so that they all appear on one page, or in a manner similar to the layout shown below.
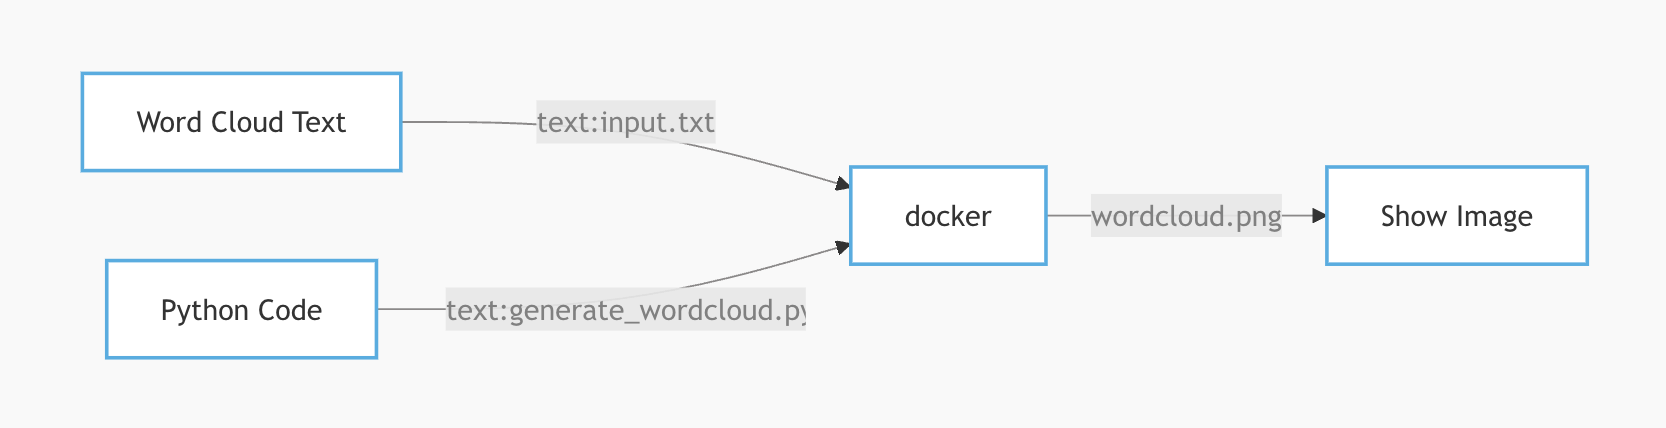
- Step 3 - Connect Metaframes: The ”Word Cloud Text” and “Python Code” metaframe will provide the text (as input.txt) and the python code (as generate_wordcloud.py) to the “docker” metaframe which will run this code to create the word cloud. The “docker” metaframe will then use this to produce an image that will be sent to the “Show Image” metaframe to be displayed. Let’s now create the necessary data connections between the metaframes. To do this, follow the steps below.
- Word Cloud Text —> docker: We first want to connect the input text from “Word Cloud Text” to “docker”.
- To do this, first go to the Data Flow menu by clicking the “Data Flow” tab at the top of the page.
- Inside the diagram that appears click on the box labeled “Word Cloud Text”.
- Inside the modal that appears you should see a dotted line pointing from “Word Cloud Text” to “docker” (if the arrow is pointing to another box, click on “docker” to select it as the output target).

- Now click on “Create Connection” then enter “text” for the field on the left and “input.txt” for the field on the right.
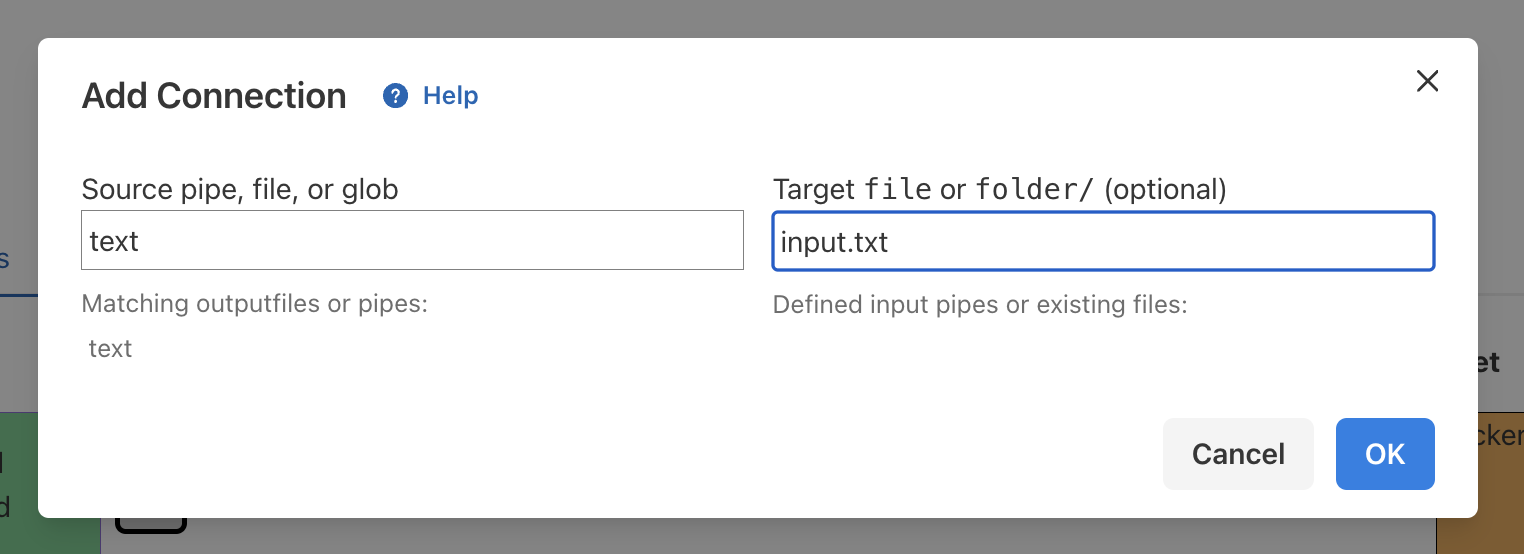
- Click OK, then Save.
- Python Code —> docker: Repeat the previous steps to connect “Python Code” to “docker”.
- Click the “Python Code” box
- With “docker” selected as the output target (orange) click “Create Connection”
- Enter “text” for the Source pipe field and “generate_wordcloud.py” for the Target file field
- Click OK, then Save.

- Docker —> Show Image: Finally, connect the output image from Docker to the “Show Image” metaframe.
- In the connections diagram click “docker” and then click on “Show Image” in the model that appears to select it as the output target.
- Click “Create Connection” and add “wordcloud.png” as the Source file on the left. Leave the target file field blank since we don’t need to change the name.
- Click OK and Save. The connection diagram should now look like the image below.
- Step 4 - Add the text content: Now that we’ve added our metaframes and connected them together let’s begin adding the content and configuring our metaframes. First we need some content to create our word cloud. This can be whatever you want, but for this example we’ve taken the first few paragraphs from the Docker Wikipedia page. First return to View mode, and then add your content to the “Text Editor” metaframe.
- Step 5 - Add the python code: To provide the python code that the docker container will run, you can simply copy the contents of the code block below and paste it into the “Text Editor-1” metaframe. You may optionally want to adjust the options of this editor to use a dark theme or provide python keyword coloring by selecting python under the Editor code mode dropdown.
import os
from wordcloud import WordCloud
import matplotlib.pyplot as plt

# Read the text from the file
with open('/inputs/input.txt', 'r') as file:
    text = file.read()

# Generate the word cloud
wordcloud = WordCloud(width=800, height=400, background_color='white').generate(text)

# Save the word cloud as an image file
wordcloud.to_file('/outputs/wordcloud.png')

print("Word cloud image generated as 'wordcloud.png'")
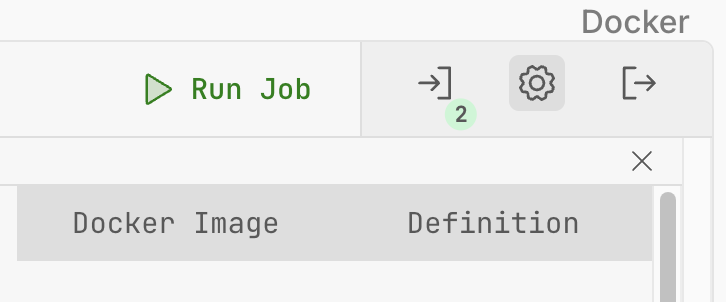
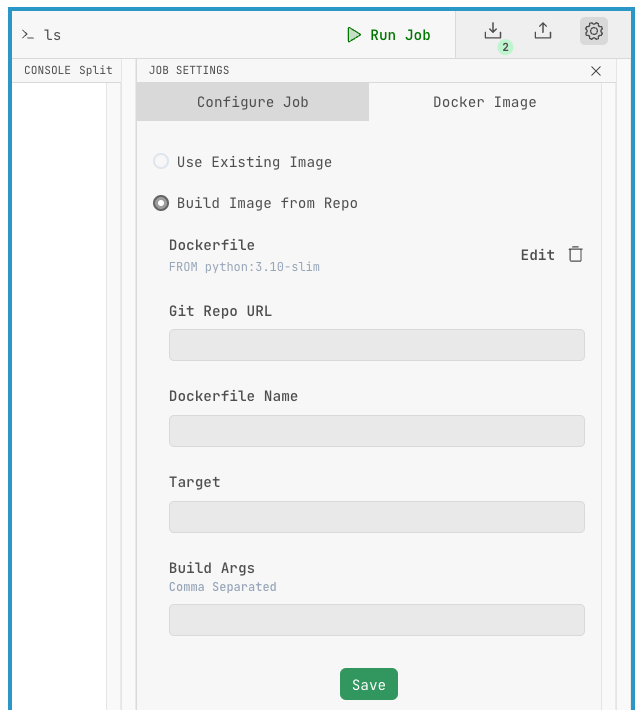
Step 6 - Configure Docker: Finally, now that we’ve laid all the groundwork, we will configure our Docker metaframe in order to actually create our word cloud. In configuring the Docker metaframe it is important to know that any inputs can be accessed in the /inputs/ folder and any outputs need to be routed to the /outputs/ folder. You may have already noticed this reflected in the python code from the last step. There are two main things that we need to do to configure the Docker metaframe. You need to specify how to set up the container, and then specify what it will run. To do this, click on the gear icon at the top right of the metaframe and follow the steps below.
Configure Image: Access the Docker Image configuration by clicking on the “Docker Image” tab. There are two main ways to specify how to create your docker image. You can use an existing published image by specifying the Docker Hub container identifier under “Use Existing Image” or you can create a custom image with “Build Image from Repo”. We will do the latter. After selecting “Build Image from Repo”, click Edit next to Dockerfile. You can then paste in the code below and click “Save”.
# Use an official Python runtime as the base image
FROM python:3.10-slim

# Install system dependencies required for wordcloud (gcc and font libraries)
RUN apt-get update && apt-get install -y \
    gcc \
    libfreetype6-dev \
    libpng-dev \
    && rm -rf /var/lib/apt/lists/*

# Install Python dependencies directly
RUN pip install wordcloud matplotlib
You can leave all the other Docker Image options blank and click Save again.
Note: A Dockerfile includes all the commands which will be run in setting up the Docker container. In our Dockerfile we use a lightweight version of python as the base image, install some system dependencies, and then finally install the python packages we will use.
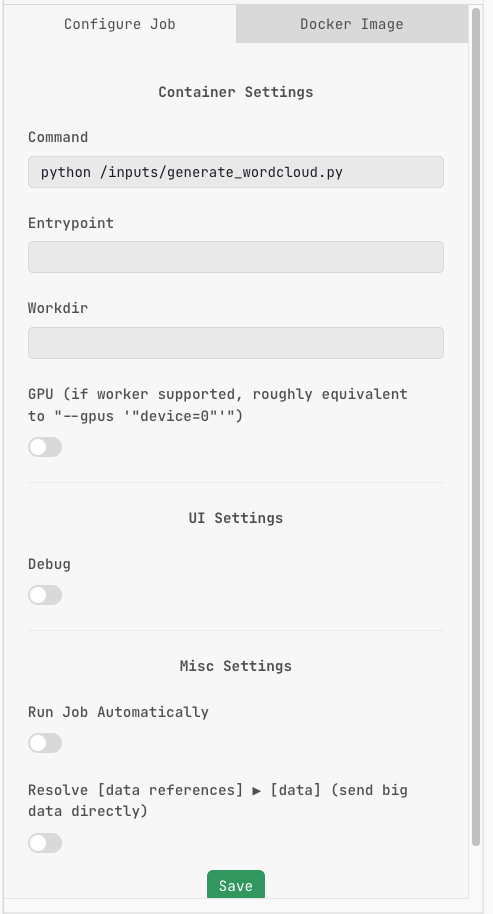
Configure Job: In the last step we specified what to install in our container and now we need to tell it what to run. Go to the Configure Job tab and under Command type “python /inputs/generate_wordcloud.py”. This will instruct Docker to use python to run the generate_wordcloud.py script file in the /inputs/ folder. All other boxes here can be left blank. Click Save.
Step 7 - Run the Job: Everything is now set up. Just click “Run Job” in the Docker metaframe to build the Docker container, run the python code, and generate your word cloud.
Congratulations! You now have a very powerful tool at your disposal. We’ve gone through a simple example here, but you can adapt the principles learned here to run any code you like inside the Docker metaframe. This can be leveraged to create arbitrarily complex pipelines for data processing, analysis, and visualization for a wide range of applications in drug discovery, computational biology, bioinformatics, machine learning, and beyond. The only limit is your imagination.
This concludes our Getting Started tutorials on metapages, but there are many more applications to learn and discover. To learn more and get inspired, please explore the application-specific Examples and Walkthroughs sections of the docs as well as our Gallery of Metapages and Metaframes.